Racing Beat mentioned something about needing special tools and their
being
hard to come by. In particular, they mentioned an "E-shaft splitter". <
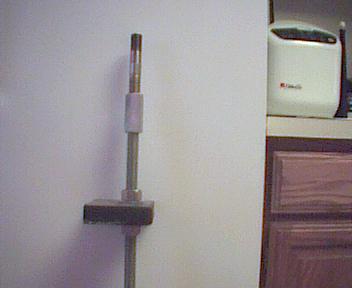
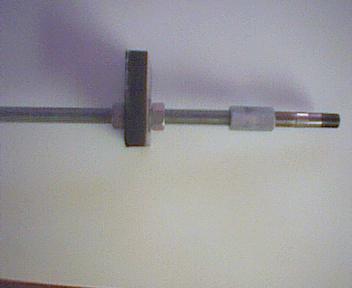
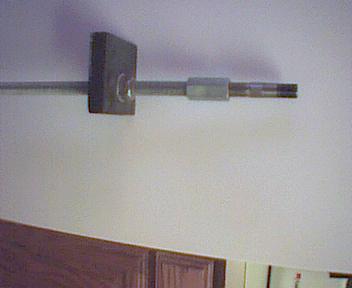
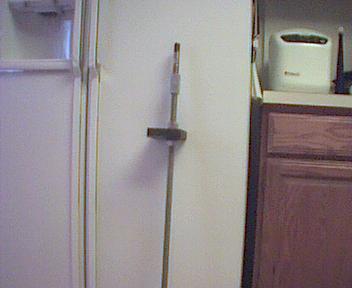
Don't sweat the E-shaft splitter.  You can make one with a 18 inch length of
3/4 inch allthread, with a 12 mm thread on one end(same thread as the o2
sensor), a heavy piece of metal with a 1 (+_) hole in it about a foot long
and a pad (Al?) to protect the end of the E-shaft.  Not quite the $900 I was
told it took for Mazda's special tool and it worked fine.

Bob Darrah
(512) 264-1717
A sketch or picture would be nice Bob. Mail me something if you don't have a scanner.

Paul Lamar
Robert Darrah wrote:
20B overhaul:

I might add that I found it better to remove only the long (16 inch) and the
short (6 inch) through bolts, leaving the 12 inch ones loosly (finger tight)
holding the flywheel end two rotors together until after you split the
E-shaft.  It holds everything together and keeps the seals from falling out.

Bob Darrah
Don Mitchell wrote:

I'm am definitely not an expert on this subject, but I would like to share my experience of completely disassembled / overhauling my 20B.  This is something I posted to the group last year after completing disassemble of my 20B.  I found that there were few special tools required except for a 2 1/8" socket, an extra long breaker bar, and an e-shaft splitter.  The e-shaft splitter I had to have made (~$80).  This give the details of the entire disassembly so if you only want to know about the e-shaft splitter just skip down to the BOLD AREA below.  I've also attached a pic of my e-shaft splitter.

Removal of all the external components (if you have them) is self explanatory.

Then, I removed the oil pan and oil pickup and then positioned the engine on the floor with the oil pan mating surface down.  The next task was to loosen the flywheel nut and front crankshaft nut which are both extremely tight.  To hold the E-Shaft from turning, I bolted a 4 foot long piece of 1.5 inch steel angle to the flywheel using washers to space it up just off the ring gear.  Then using a 24" breaker bar and a 2 foot pipe extension I was able to break the front crankshaft nut loose.  Only turn it enough to get it loose but don't back it off yet.  Then I tried to break the flywheel nut loose the same way but ended up breaking 2 breaker bars and then buckling the angle iron I had bolted to the flywheel to hold it from rotating.  After a full day of trying various methods to break the flywheel nut free, I resorted to chiseling the damn thing at one side until it rotated.  Luckily I had already ordered a new flywheel nut from MazdaTrix.  I unbolted the flywheel and removed it from the counterweight.  Then I slide two pieces of 1/8 inch plate steel between the counterweight and stationary gear / rear seal.  Then I put the bolts which previously held the flywheel to the counterweight back in place and snugged them down such that the bolts bottomed out on the plate steel thus putting the counterweight under tension (don't tighten too much or you will damage the bolts or counterweight.  Rap on the side of the counterweight with a hammer a few times and then retighten the bolts again and rap it with a hammer once again.  This popped the counterweight loose very easily.

Next, I positioned the engine with the front cover up and removed the front cover, oil pump and drive gear, counter weight, thrust bearings, and front stationary gear.  This is all self-explanatory as you do it.

Then I started to remove the tension bolts that run through the housings.  For this step, I got a good tip from Bob Darrah in the Austin, Texas area.  Since the tension bolts enter both ends of the engine, I again positioned it with the oil pan mating surface down so I could get to both ends of the engine at the same time.  There are three lengths of tension bolts:  Long, Medium, and Short.  All the long and Medium tension bolts are installed from the flywheel side, and all the short tension blots are installed from the front cover side.  Remove all the Long and Short bolts but leave all the medium length bolts in place.  If you remove a medium length bolt just put it back and snug it down and move to the next bolt.  Once all the tension bolts are out except the medium length ones, position the engine on end with the front cover side up.  Tape the threads on the end of the E-Shaft using electrical tape for protection.  Tap on the end housing with a rubber dead blow hammer to free it up and carefully lift it off.  Then tap the front rotor housing and VERY carefully lift it so as not to spray apex seals, etc. across the room as it comes off.  Next lift off the rotor making note of any oil control rings/springs that may stay behind.

At this point, the E-shaft must be split to continue with disassembly.  This requires a special tool which I had machined and then assembled.  (Cost ~ $80)  It is basically a puller that threads into a 18mm x 1.5  threaded hole in the end of the E-Shaft counterweight.  Without this tool, this step seems like it would be impossible, but with the tool it only took me 5 minutes to split the shaft.  Now that I have a tool made, I would be happy to send it to anyone who needs it as long as you send it back after your finished (or I can provide you a drawing or pics).  The puller basically screws into the E-shaft counterweight and them goes up over the PROTECTED end of the E-Shaft thus providing a pulling force parallel to the E-shaft and across the seam or both e-shaft halves when you hit the it with a hammer.  If you need more info about this step of would like to borrow the puller just call me at 972-943-9050.

Once the E-Shaft is split, the rest of the engine unstacks very easily just as in the previous steps.  When I got down to the last rotor housing, I found it easier to simply lift the E-shaft out prior to lifting off the last end plate and rotor housing.

I hope this helps someone!!!!  If not, just press "DELETE".
Good luck with your 20B projects and feel free to call me anytime.
Sincerely,

Don Mitchell
509 Tribal Rd.
Plano, Texas 75023
(972) 943-9050
MitchDCGS@aol.com
Velocity Standard Fixed Gear / 20B NA with Tracy's EC2 and RD-1B
The AirCraft Rotary Engine NewsLetter.              Powered by Linux.
ACRE NL web site.
http://home.earthlink.net/~rotaryeng/            http://www.linux.org