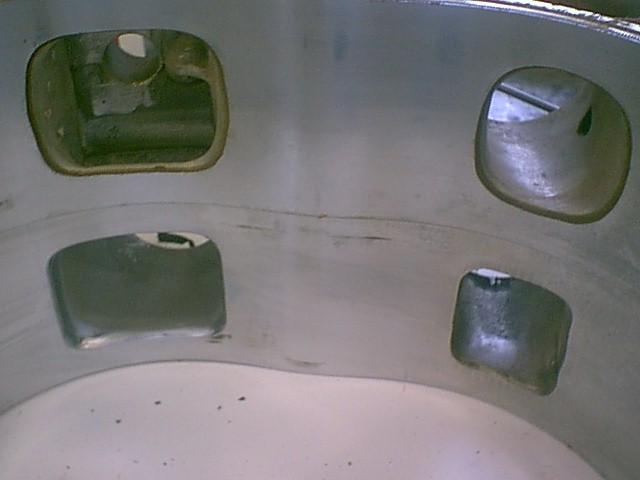
If you are still unhappy you can go to the periphery port later and just
epoxy the side ports shut. You can
  assemble part of the engine and copy the side port timing onto the rotor
housing with a marking pen and
  a small square. I used a piece of exhaust pipe formed into a square on one
end, and epoxied into place.
  I think this will be "air show" power on a Tailwind.

                                               Lynn E. Hanover


 Lynn,
 You wouldn't have any drawings on that mate- just to make life easier,
 or Everett Hatch for that matter, what a lovely set-up!
 George (down under)

  I will assemble some parts and send some pictures of a periphery housing
and a bridge ported housing set.
  They look like the Racing Beat set but without the threading system they
use. Very easy to do. I will work on it.
                                              Lynn E. Hanover

Here is the start of a home made Periphery port housing and a factory
periphery port housing. The outer part of the casting has yet to be cut away.
Use drill bits and die grinders with carbide bits. A piece of exhaust pipe
tubing is formed into a rectangular shape on one end and fitted into the port
with about 2 inches protruding on the outside so as to attach the intake
pipes. The water jacket is poured full of (in my case) Devcon Plastic Steel,
or other such material. The inside of the tube is trimmed below to surface of
the chrome liner so the apex seal is not damaged. If the housing you start
with has a case bolt in the way, (older housings) just cut right through it.
Leave the bolt out but remember to tap and plug the bolt hole in the rear
cast iron to keep the water in the engine. The intake tubes attach with short
bits of radiator hose and hose clamps.
Second try.

Paul Lamar

The AirCraft Rotary Engine NewsLetter.              Powered by Linux.
ACRE NL web site.
http://home.earthlink.net/~rotaryeng/            http://www.linux.org