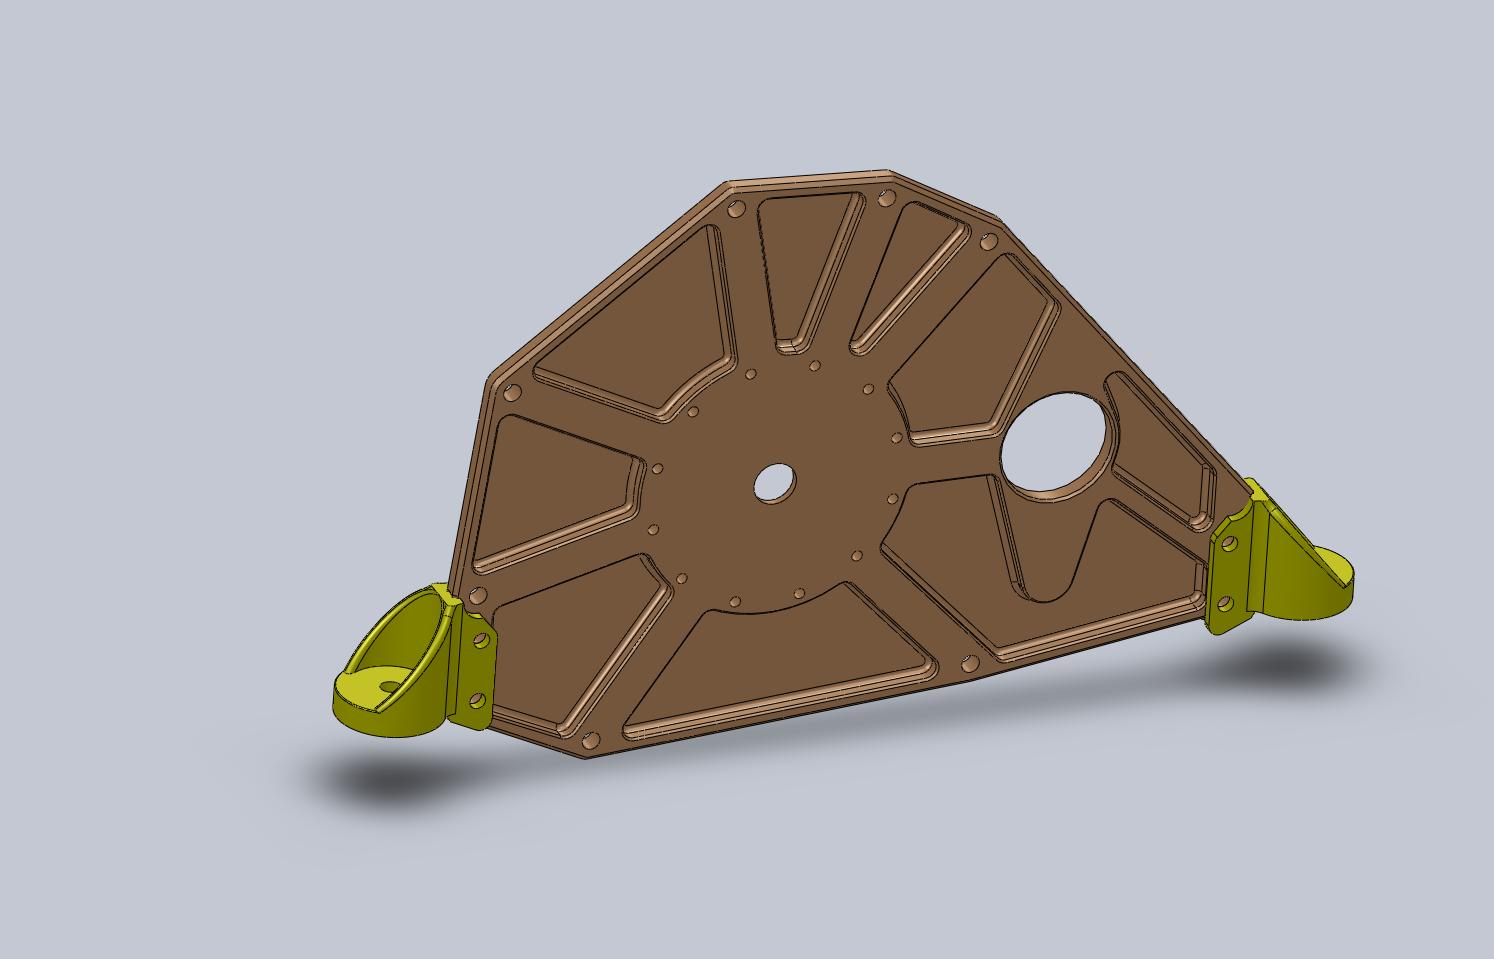
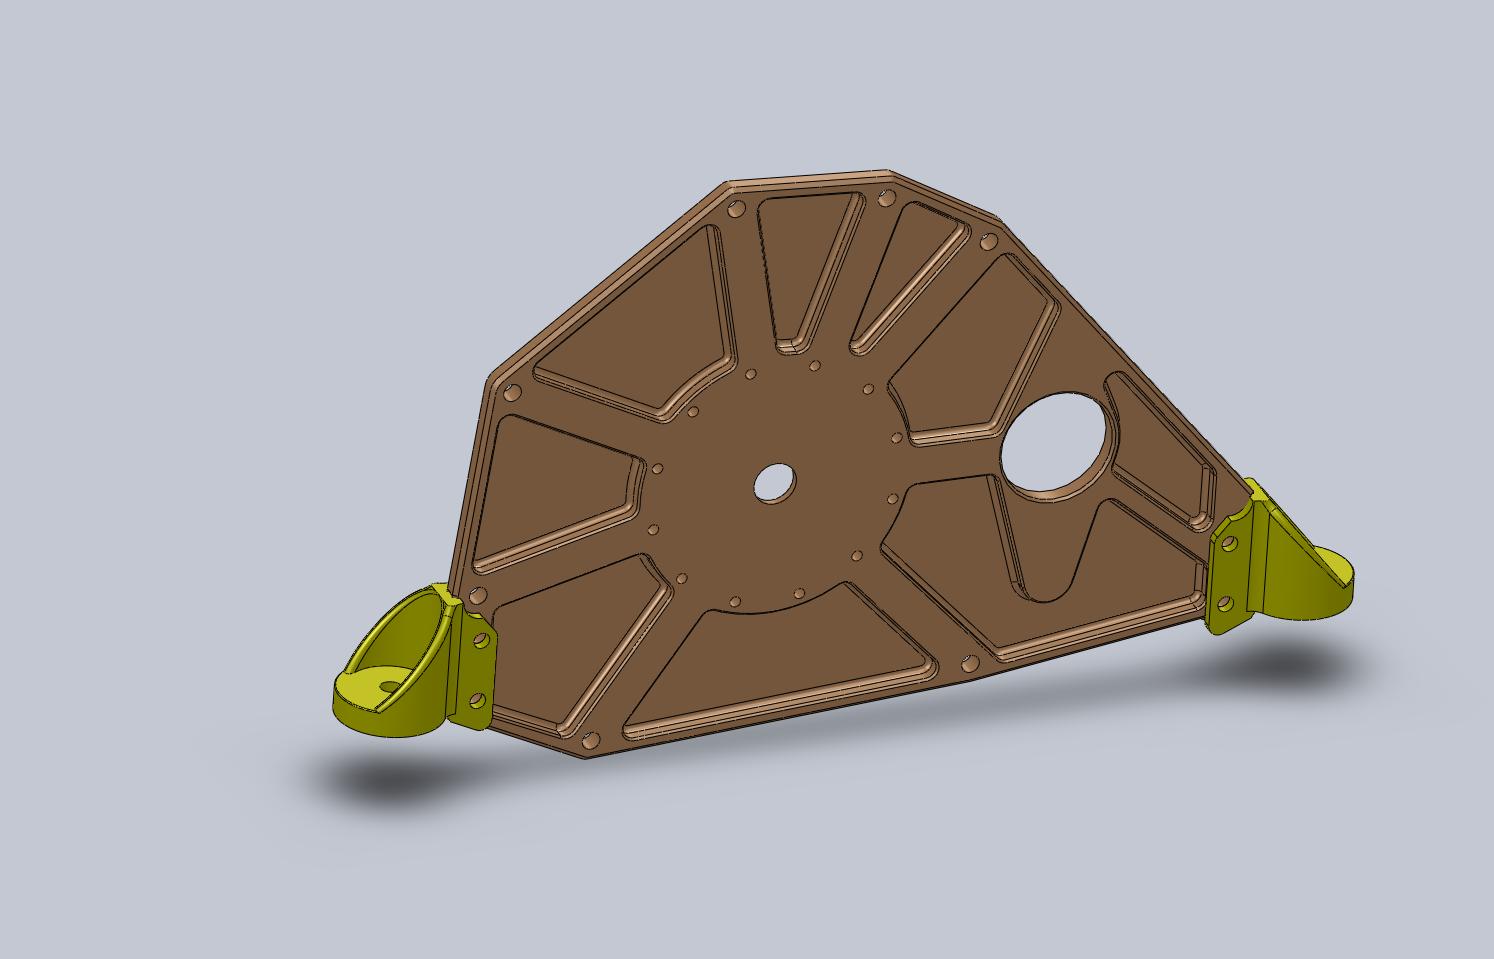
A few minor problems for the 13B. One hole was ten thou
off or so but it could be drilled out with no problems.
One cup tab was a bit too long so that could be hacksawed off.
We had a few typical bolt circle problems but easily fixed by
drilling the holes out to 27/64th instead of 10 MM.
Other than that the 13B was usable. The starter hole
was a bit on the small side but I can set it up in my
cheap Chinese mill and bore it out about .020.
The starter hole should be 2.640.
I was working from Tracy's dwg and I should have
checked the dwg against Tracy motor plate which I also have.
The drawings had a few errors and I probably made one or
two my self. The dwg does not match Tracy's plate :)
The RX8 extra bell house bolt was way off by about a half inch so
that is going to require a whole new dwg which I have about done.
I want to make the plates fit both the 13B and the RX8 motor.
Jeff I'll get the fixed dwg to you in a day or so.
Paul Lamar
Paul
So this is usable. If you want I can open up the starter hole
here. It
measures 2.620 on the solid model. I depend on the solid
model for
geometry for expediency. If you need to digitize the bolt
pattern on the
housing we can do that. We need absolute numbers. I do not
know the
difference between the RX7 and 8. the half inch hole problem,
does that
make it unusable??? No worries, we just get it right for the
folks that
need them...
jeff
I'll ship it back if you want it. I only have one RX8 end housing
and it is on my RX8 P-port test engine which I don't want to
take apart.
I think I got it measured fairly accurately.
If you have a 13B end housing that would be a good one to
digitize.
The solid model is now fine. I fixed it. Jarrett has it now and
he is converting it to a Solid Works file for you. I made a
couple of
other changes while I was at it. After you do it three or four
timesyou get better and faster. The new version is much more
accurate as
I had been there and done that :) All ribs are now the same
width and
parallel. We need to drill all the 10 mm holes out to 27/64th
as that
will ease the bolt circle problem.
No change in the back pattern.
We should look into a spun or pressed bell housing and use
the two
hollow
dowel pins on the end housing to locate the unit more
accurately. Along
with a lighter weight gear box of course :) The bolt and spacer
idea is
less than ideal.
Paul Lamar
Paul
I think when you send me the new geometry I will make a
template, send
it to yo then you can check for fit. I am not in favor of
making the
holes larger. I can use my machine as a CMM and get the number
exact. I
did that with the rotor housing and it is perfect.... We save
these master coordinates for all future parts. This should be
done all
around the block.
I have machined bell housings before. Lots of aluminum chips but
can be
done fairly quick as opposed to finding and getting someone
quote, setup, bid,etc. Lots of time and money.. My guess a
billet block of 6061 for a bell housing would be atleast 60
lbs..Al plate is a little over $3.00/lb. Figure $200 for
material. It will machine down to about close to 8 lbs or less.
If thehousing is not too complicated with lots of ribs, this
could be machine in1 day. More, obviously for the first
article sample, but for anyproduction at all, $600 to $700 is
doable. Eventually get acast part , but this way we could get
something out cheaper and sooner... I agree the bolt and spacer
arrangement needs to be fixed....
jeff
No doubt about it that is the ultimate solution. I rejected it in
the past because of the cost. Prices have come way down on NC
mill stuff as a lot of people have the machines payed off.
The problem with sand casting is weight. The foundry has
problems with
anything thinner than .2 inches. Also the cost of sand
castings has
gone way up. NC milling is now more competitive.
Try these until Jarrett gets the SW version out.
Paul Lamar
Paul
Tell Jarrett no need for file conversions anymore. I have a new
SW2009 seat so all will work directly......
jeff
Great. Thanks Jeff.
I'll bet it will load Rhino native directly :)
Paul Lamar
Paul, I did this over lunch so it's the quick version. I didn't
put the cups
on as we know they are strong enough. I just fixed one end
where the
cup goes [the farthest from CL] and the second one I fixed it such
thatit was still moveable from the first yet fixed in the vertical
plane [similar
to how flexible an engine mount 'could' be. The trick here is
if I
make both
ends fixed [ie cast in concrete] then there is some degree to
stress that
is carried via tension between the two fixing points. When I put
one fixed
and one fixed in the vertical only ?I think we get a better
representationof the loads w/ a mount that has midle
deflection at
load. It looks ok still
to me.. but I haven't spent too much time going over the
results. I can do the 'real deal' test later tonight but
thought this might help in the mean time.Let me know..Jarrett
That ia much better.
Jeff this is the new design fixed with the RX8
hole in the right place. I also added a rib on the highly loaded
left side. The stress level is now very conservative which is what
I was shooting for.
Thanks Jarett.
Paul Lamar
No problem, do you want me to do one w/ the cups on it.. or are we
good at this point?
Jarrett [geeze I've got to slow down when I'm typing.. and then
proof read.. sorry about that...]
NO cups needed. We are good. Jeff might need a solid works file.
Paul Lamar
Ok, Jeff, let me know if you do. Btw those PSRU holes where put
in on
a 5.875" B.C.
Two holed on the top x 12 holes [30deg OC] Each being 0.25dia. That
sound correct?
Jarrett
Jarrett
I got the iges...... there where no holes for the psru and no
registerin the back. All the geom comes in as splines. That
make it difficult
to separate out for machining..do you have in SW a standard set
made in
lines and arcs. It's easier to manipulate and takes a lot less
memory.If you don't' I will make a version here that's cleaner
but we
need to
get the design absolutely established. send straight up SW from
now on,
no more conversions.
jeff
Did you try the step file? Jarrett has it in SW and he will
send it.
Paul Lamar
Here's the SW file.. unfortunatly this too has splines [I've yet
to see
any that don't when they come over this way..]
On this part [due to it being a basic 2D geometry for machining
[2.5D]]one might as well just switch
it to a dxf/dwg. The file is attached... I don't have the rear
registerin there [didn't have time to go back
and look up the dim's for it]. I put the PSRU B.C in but need
Paul toconfirm the dim's [about 3 postingsabove this one]..
Sorry not a huge help.. :/
Jarrett
I think the splines are when I use the "fillet curve" option.
It ask for a radius but I think it "blends" the curves. One of
the really neat features of Rhino. That is why it does cowling's
and other compound curved shapes so well. It will also blend
surfaces and loft.
Fortunately sldprt is not a text file and does not need to be zipped.
--------------------------------------------------------------
Here is Tracy's dwg on the dims Jarrett.
Paul Lamar
Ok, my bolt circle should be correct [it matches] the registration
hole will need to be
added but thats minor [just a 1.504" hole x 0.310 deep. I can up that
on and re-send
if Jeff needs it..
Jarrett
Jarrett
No need I got it..............1.504............I had 1.501........
Paul ..got the plate in today. do I bore the starter hole? or is the
part not usable??
I will make a template for fit right away, then order more material
when it looks good........
jeff
My mistakes. I should have checked Tracy's dwg with the real world :)
You did a beautiful job making this plate.
Bore the starter hole out to 2.645" (now 2.630 I think). I just used
my dial calibers to measure two different starters :) That should
give .010 clearnace on the diameter. Tracy called out 2.675" but I
think that was for a different starter.
The mounting holes in his dwg are wrong for most of the four
starters that I have. An over size hole won't hurt however as match
drilling the starter mounting bolts will take care of any minor
misalignments. The starter everybody should use is the starter with
the solonoid at a 45 degree angle as the starter in the left of this
picture. It has 12 teeth. The other one has 13 teeth.
The right cup tab is too long by about .1 inch. (pilots view) Make
it the same as the left cup tab. Easier to weld on the cups. The
welder will have to do a bit of filing anyway to get rid of the
radius and fit the cup.
One 10 mm hole is slightly off by about .030". I don't know what
happened there. Could have been an error in the dwg. I very
carefully converted the polar coordinates of Tracy dwg to
rectangular coordinates.
Consequently this hole needs to be elongated slightly in a
Northwest direction by about .030" It won't have any affect on the
plate location because of the five other bolts. The bolt will then
screw into the end housing easier. It can be screwed in now but it is
a bit too tight.
Paul Lamar
That is the fanciest motor plate I have ever seen! A little Zoop Seal on
it to keep the finish and it will always look that good. Excellent work.
Dale Davies
opss that is North East and not North West.
And I am supposed to be a pilot. Well according to the FAA anyway :)
Paul Lamar
Paul
You open at all to bolted on cups....saves mucho welding issues.............
jeff
That is great Jeff. I hope it does not add too much to the cost.
How long does it take to make a cup like that?
I am open to that. I guess one would have to find a welder and
pay him anyway.
Paul Lamar
--
The Rotary Engine NewsLetter. Powered by Linux.
ACRE NL web site.
http://www.rotaryeng.net
Youtube key word UTUBPLEASE
Copyright 1998-2009 All world wide rights reserved.