http://www.sae.org/mags/AEI/6906
http://www.freescale.com/support
C. Smith
I'll second that. In the true spirit of the 555 one computer per
injector.
If we can get this to work it will be off the shelf ignition and EFI
at very low cost indeed. Modular and redundant for safety.
For a two rotor, four FreeScale demo PC boards would be required
aseach one has an injector driver. Two triggers are no problem
for usas each rotor fires once per rev. Just like a one cylinder
two cyclepiston engine.
Hopefully there is a one cylinder 2 cycle piston engine FreeScale
software example that we can use to get a fast start.
I downloaded a bunch of stuff and got this version of the code
warrier up and running. Do we have any C programmers on here?
FreeScale makes you jump through a lot of hoops as far as
registering and activation which is a real pain in the ass. I called
them and tried to explain I don't run windows on the Internet for
virus reasons so on-line activation does not work for me.
Thanks Craig for letting me know about this.
---------------------------------------------------------------------------------------
OK I found the section in the user manual that talks about the 50cc one cylinder
sample program which should work for us as is. All we need do is modify it if we get lucky.
Quote:
" Once you have installed the CodeWarrior application and become familiar with its
operation through the virtual lab, the software development environment can be
validated. Software Development Environment Validation Exercise
1. Create a new project in CodeWarrior for the MC9S12P128 MCU using the Project Wizard
that appears when CodeWarrior is launched. Create the project using default settings but
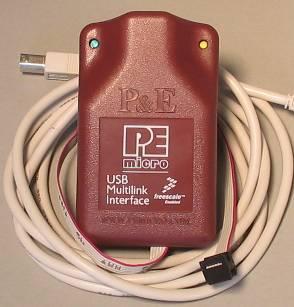
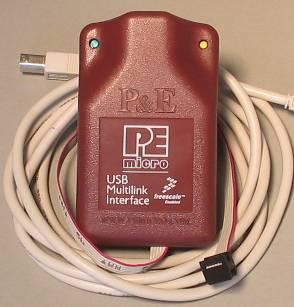
be sure to include the USB BDM tool [USB connector see attached file] included with your
kit as the target connection.
2. Once you have the project created, verify the integrity of the empty software project
by doing a build.
3. Once successful, connect the ECU to your 12V power source using your simulated load
harness.
4. Next, connect the PC to the USB BDM tool. Installation will be required if this is
the first connection to the PC, follow on screen menu and install driver automatically.
5. Connect the BDM ribbon cable to the BDM header on the ECU, note the location of Pin 1
as the red wire on the cable and number 1 near the header.
6. Press the debug control in CodeWarrior to download the empty software project to the
ECU. Follow the on screen menus to connect and program the ECU, as performed in the
Virtual Lab for the S12XE.
7. Press the “GO” arrow and allow execution for a few seconds before pressing “HALT”.
The source window should show the processor stuck in an infinite FOR loop. This verifies
that the ECU is working and the software environment has been created allowing
programming and development. As a final piece towards a complete development
environment, a build of the example software will verify if all of the tools discussed
this far are working on your system. System Setup Validation Exercise
1. Save the example application software by copying the folder “Example Scooter
Application” from the DVD. This is a CodeWarrior project that contains a working
application that runs a 50cc scooter engine
2. Open “My _Engine_Project.mcp” in the saved folder through CodeWarrior.
3. Build the project. [means compile or assemble]
4. Program the ECU by providing power and clicking debugger per previous exercise.
5. Run the application using the green “GO” button.
6. Stimulate the application by running the engine position simulation and using the
Engine Stop Switch. Operation should be identical to simulated engine environment test
performed above." End of Quote!
Does anybody have one of these demo boards yet?
Paul Lamar
--
The Rotary Engine NewsLetter. Powered by Linux.
ACRE NL web site.
http://www.rotaryeng.net
Youtube key word UTUBPLEASE
Copyright 1998-2009 All world wide rights reserved.