How about a dual ignition systems? Assume coil-on-plugs design
and that we would use a two stroke marine engine magneto and
coils incorporated into the starter gear or torsion plate area
of the housing. Also assume we would have capacitor driven
ignition modules like the new solid state digital programmable
MSD, 6AL-2. Check them out. Small and compact. One for each
rotor.
First some givens about our rotary engines with the single
leading plug: The engine doesn't run very well on trailing
plugs alone, as quite a lot of the fuel goes out the exhaust and
is burned in the exhaust system. Said another way, with a two
rotor engine and a leading plug fouled, the exhaust system may
well overheat, or the engine would run rough enough that we
would want to shut it down after a short time. That means the
Achilles heel of the Mazda rotary is the leading plug. As
quite a few members have pointed out though, a spark plug is
pretty basic technology. Yes I agree but I also can't count
the number of times I have had them crap out on a 2 stroke oil
burning engines. Prudence would dictate changing them quite
regularly since it is a critical point of failure or beg Mazda
to cast us up some two bung leading plug housings.
Conversely if the trailing plugs fail the engine power only
reduces about 3% if that. So with a good leading plug and a
magneto system, the engine would continue to operate just fine.
BSFC will be a little off but we won't get our feet wet and the
plane can continue on for many many hours.
OK we can all agree that a magneto is basic technology and
very fail-safe. The magneto fires when a magnet passes by
coils set 180 degree (20Bs would need three spaced at 120
degrees) apart. These coils could be wound to produce 300
volts. Timing can be fixed for a cruise rpm.
Now for the plus alpha. The MSD ignition devices can be
programed to fire the leading (and trailing) plugs many times
and at moments when the magneto isn't doing that. Each MSD
power pack could get its signal to prepare for a firing
sequence from the magneto or modified coil voltage pulse. Since
the MSD devices have intelligence they can vary the timing with
rpms. and other inputs received from sensors or even a
MEGASQUIRT engine control board.
The question is, How do we isolate the MSD power from the
magneto power because they are both hooked up to the same coil?
Diodes are the easy answer but I wonder if that is a robust
solution? In the scenario above power unit could be charging
the leading plug coil.
A FET switch might be an answer but the fail safe would have
to allow the magneto to continue firing the leading plug coil
FETs on the two MSD outputs to the leading and trailing plugs
would allow split timing if necessary at the higher rpms. For
instance the magneto fires the first burst on the leading plug,
followed immediately by two stronger pulses from the MSD
Capacitor while perhaps a third pulse from the MSD is directed
only to the trailing plug.
Your thoughts?
Doug in Japan
I think you are making a mountain out of a mole hill here Doug.
A phenomena call sag happens when the plugs get to be about 50
hours
old or so. Minor loss of power.
The solution is put in new plugs on a regular basis. The plugs
catch
hell in a rotary as they spark twice as often as a 4 cycle piston
engine. The same as a two stroke. Now this has been reported with
inductive type ignition only but as far as I know nobody is using
a CD
system in a flying aircraft. CD systems have a proven track record
of making plugs last longer in piston engines.
No telling what the CD spark plug life would be in a rotary
until we
get some good data. The MSD ignition apparently only fires more
than
once up to some RPM which I know not. I have talked to their
engineers
about it and they don't seem to understand the rotary so they
cannot
give me a good answer. One MSD system per plug would give a lot of
redundancy.
We don't have any data running on trailing plugs
alone for a period of time so it is hard to say what will happen.
Ignition failures of any kind are rather rare with the possible
exception of 2nd gen igniter ballast resistors which can be traced
to continuous high RPM use. The wattage rating of these resistors
must be increased.
Tracy also had problems with early Corvette
coils over heating but I suspect that was caused by excessive
dwell and the fact they were being triggered twice as often.
One unknown is the charging coil in an outboard motor may not be
able to charge more than one capacitor at a time so the outboard
type ignition system may require two magnets, two capacitors and
two charging coils per rotor for firing both leading and trailing
coils. Some experiments need to be made to check and see if this
is true.
You will also need outboard type CD coils as RX8 or Corvette
coils per plug will not work with CD systems.
The thing about 2 cycle outboard coils is they are designed
to run at high RPM and CD systems are actually easier on coils.
They become mere pulse transformers and not a device to
store energy. In that case they should be far more reliable
Paul Lamar
Hello Paul,
Attached please find the wiring diagram for a 1977 V4 2 cycle 85
HP outboard. I do believe the stator and circuitry is more
complex than the application we are looking for due in part that
it is working 4 cylinders instead of two. If perhaps someone
had a wiring diagram of a 2 cylinder 2cycle outboard it would be
even better.
With regards to the throat diameter of the carbs I was
considering, I was going to use Tracy's estimate of 1 square
inch per 50 horsepower. Is that in the ball park or should I go
larger? I have not thought about a P-Port yet as I'm still
learning and the thought of taking a grinder to the engine is,
at this point, beyond my ability.
Regards,
FranklinHello Paul,
Attached please find the wiring diagram for a 1977 V4 2 cycle 85
HP outboard. I do believe the stator and circuitry is more
complex than the application we are looking for due in part that
it is working 4 cylinders instead of two. If perhaps someone
had a wiring diagram of a 2 cylinder 2cycle outboard it would be
even better.
With regards to the throat diameter of the carbs I was
considering, I was going to use Tracy's estimate of 1 square
inch per 50 horsepower. Is that in the ball park or should I go
larger? I have not thought about a P-Port yet as I'm still
learning and the thought of taking a grinder to the engine is,
at this point, beyond my ability.
Regards,
Franklin
Nothing was attached Franklin. Try again.
1 square inch is on the small side for 50 HP. 1 square inch
is more like 45 HP
Jeff can do the p-port thing for you.
jeff.doddridge@gmail.com
A lot easier than making a manifold however you must
be willing to disassemble and reassemble your engine.
Mazdatrix will also build a P-port engine for you with
Jeff's modified p-port rotor housings.
Since you are using carbs you won't need the slide throttle.
Read this.
http://www.rotaryeng.net/intake.html
If you still want to use a side port a lot depends on how
much room you have under the cowl when building manifolds.
What kind of airplane are you building?
Is your engine a 4 port or six port?
Are you good at tig welding aluminum? Steel welding?
Steel tubing is the easiest to use as the welding skills
required are minimal.
Here is a trick for the transition of round tubing
to oval intake ports. Don't try to flatten a round
tube. The area will be much reduced which will seriously
affect the HP you get. We have been all over this in years
past. A lot of people have been disappointed in the results
when building side port manifolds.
Paul Lamar
Let me try the attachment again.
Regards,
Franklin
There seems to be enough parts for a two rotor but they
must be rearranged. I am not sure as there is no picture of
the flywheel showing the position of the charging coils
and firing coils. Do you have a digital camera or a cellphone
with camera?
BTW I just found a source for magnets. This is a major
breakthrough for us.
http://www.maxrules.com/fixomccdi11.html#MAGNET
I can now go wild designing a magnet holder which is the key
to the whole works.
Paul Lamar
Attached are pictures of the flywheel from the Johnson. As you
can see there are sets of magnets embedded into the flywheel and
then machined smooth. There are 6 sets of magnets or 12 magnets
all together. I'm not certain but I do believe that the sets
are opposite in polarity. I'm fairly certain I read that
somewhere.
I'm planning on building an aerocanard and I'm trying to keep it
as simple as possible. Don't believe I will be able to do the
gravity feed fuel system, so I'll have to go redundant on the
low pressure fuel pumps.
Franklin Canosa
Lots of magnets in there. I think I have found a picture of
what goes with it which I included. Do those look familiar?
The two light colored coils are the charging coils for the
CD ignition. The other two are the generator coils.
The big challenge now is making a light weight holder for all
those magnets that will fit the e-shaft. Do you have a friend
with a lathe? You will get an alternator out of the deal.
Paul Lamar
Paul,
Yes those are part of the CD system. The blue ring device is the
'spark advance mechanism' that we can probalby do without as you
suggested we just time the engine to 22 BTDC. The stator is
correct and you are correct (I believe) about the different coil
purposes.
I don't have direct access to a lathe, but would be willing to
send down the parts from my old outboard for experimentation
purposes. I still have the stator, flywheel, a couple of good
coils and perhaps even the power pack. I was going to try and
sell them on ebay, but I would probably get 10 bucks for the lot,
and this is a far more fun and useful application of the parts.
Let me know your thoughts.
Franklin
I would like to take a close look at that flywheel.
Most of the other parts are interchangeably or can be bought
used or new.
I would like to put it in a lathe can cut it down
to drastically cut the weight and then make an aluminum
hub for it to fit the flange on the e-shaft. The flywheel
aspects of it are not needed and in fact it is not good
to add rotational inertia to the front end of the e-shaft.
This. I think, is the key to making this system practical.
With the flywheel I have all I need do is drill out
the rivets to remove the magnets. I can then mount
them in an aluminum hub.
Paul Lamar
Paul it may be simpler than that. Machine the outboard flywheel
to fit under
the damper, machine it lite and use as is. a stupid suggestion by
milo!
I'll investigate that option shortly. I have one of Tracy's
dampers sitting right here.
-------------------------------
Here is what I have so far. I just had an idea this morning
on how to make this a bit cheaper and better.
If I chuck the front hub with
the bolted on pulley in the lathe I can take an small internal
cut out out of the steel pulley to insure it is concentric.
Then press in something that looks like this.
The groove will be filled with uni carbon to cut
the rotational inertia and increase the burst strength.
Important at 7500 RPM.
Paul Lamar
Paul
"More than one way to skin a cat." BTW, historically that phrase
was about cat fish not the long felines.
Generators or magnetos coils work in the radial plane like most
alternators and the featured motor boat stators as you have
posted. Another way to do it is counter sink circular magnets
into an aluminum starter gear or perhaps Tracy's Al. flex plate
and place the coils pointing in the axial axis. Coils and
magnets can be mounted on either side (or both) the flex plate/
starter gear in a circular pattern.
However just slapping in a outboard motor stator and coil
components is no guarantee it will work as the operating design
rpms are quite different and the speed range on the rotary quite
wide. Output voltage and efficiency varies with rpm so voltages
will be all place. You may need a DC- DC converter circuit board
to smooth out the voltage.
Doug in Japan
Good idea Doug. Circular or cylindrical magnets are much easier
to buy that is for sure and much easier to implement. Maybe no
cheaper. We are looking at $100 for just four. The cheapest is to
find an old outboard motor and scavenge the magnets out of the
flywheel.
I'll do a dwg using the round magnets.
Voltage variation on the CD ignition system will not be much of a
problem. Outboard motors have to have spark at starting
RPM's too.
You may not get 12 volts at start up but 6000 RPM at cruise
will be no problem.
-------------------------------------------------
To make a magnet carrier out of this will require a new plate
and cutting down the Ford spline flange. The number of
rivets Tracy used is way over kill. My RX8 clutch disk
has only four. The rivet circle diameter will have to be reduced
to make room for the magnets. Round or other wise.
Paul Lamar
--
Paul,
I appreciate the circuit diagram. Thanks for posting it.
Instead of another triggering coil weren't you considering using
a hall sensor circuit?
I personally wouldn't mess with trying to make an alternator and
just concentrate on two [ignition-charging] coils. Alternators
are cheap and well tested with high regulated amps in a small
package.
Doug in Japan
I tend to agree with you Doug on that. In fact one might
spend less money just using an alternator.
I just weighed Tracy's damper plate and was shocked to find it
weighs 5 pounds. Here are some places to machine to save a pound.
I also placed 4 round 1.5 inch magnets but I don't think it is
practical to install the charging coils here without a major
redesign of Tracy damper plate. Just not enough space
between the damper plate and the PSRU adapter plate for both
magnet and charging coil. Perhaps with large 2 inch dia. holes in
Tracy's PSRU adapter plate that the coils could poke through.
Paul Lamar
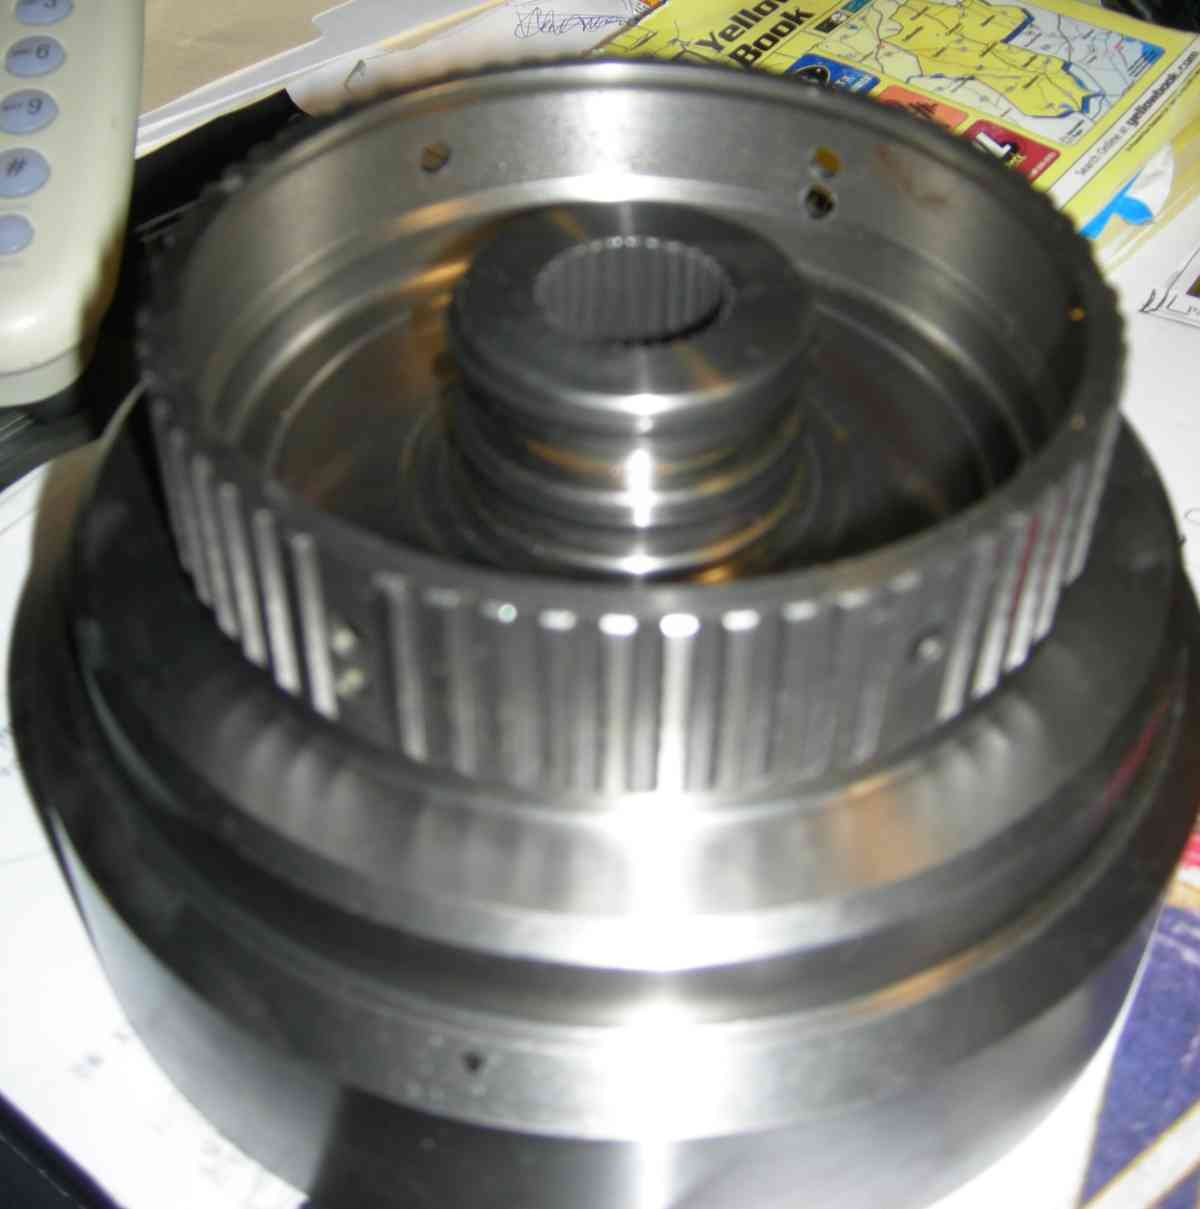
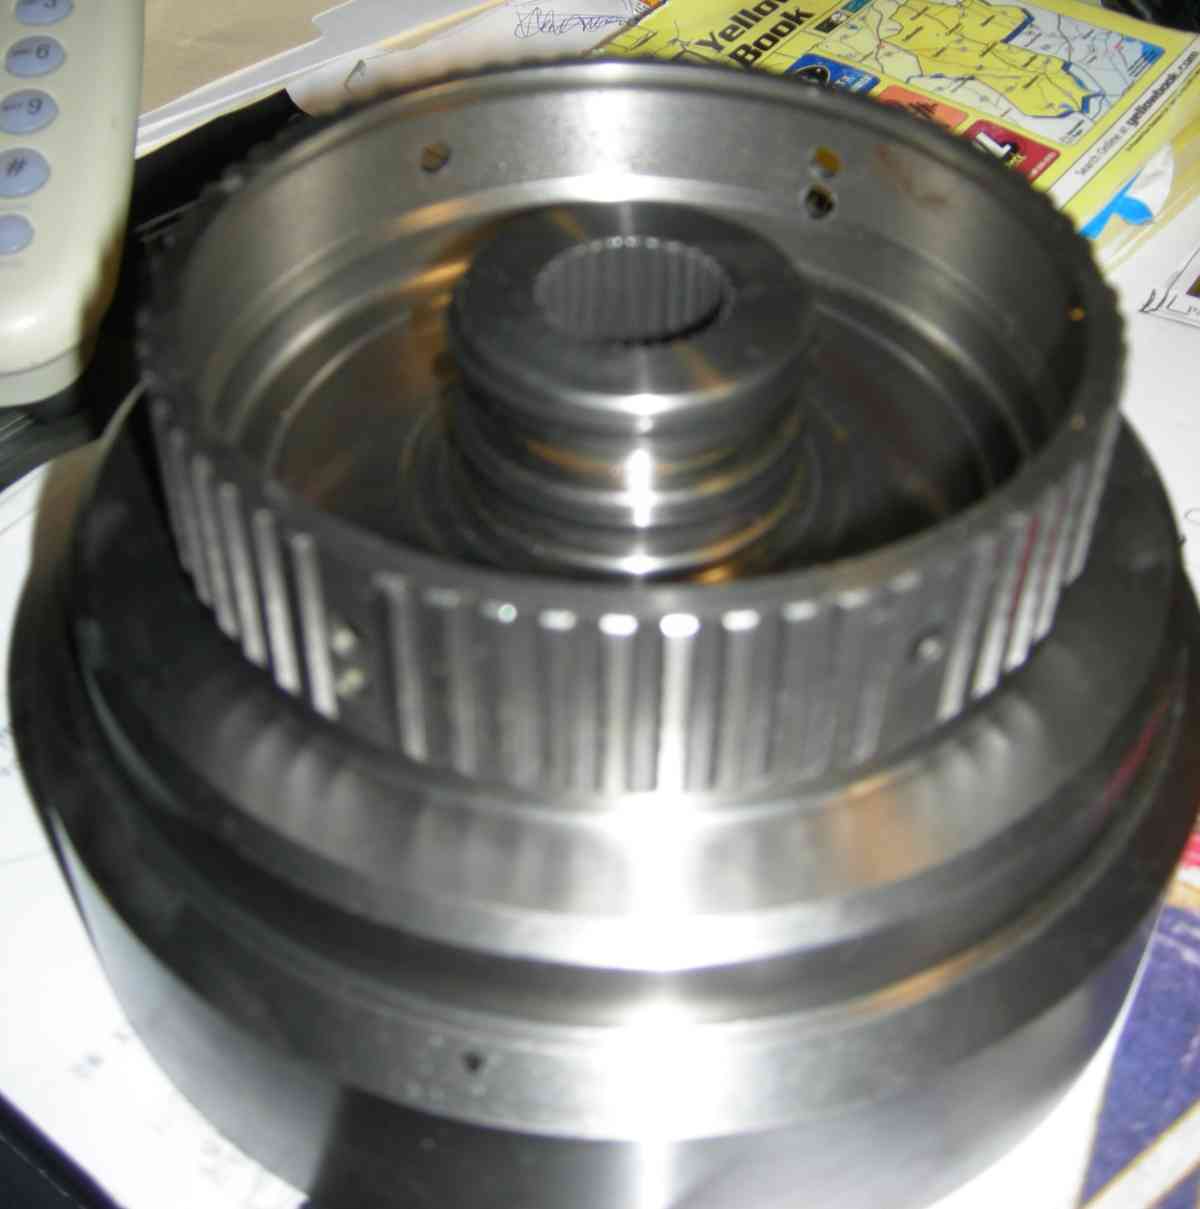
Paul The part of Tracy uses is from Ford and i have one which
you can keep the front drum to secure your magnet and cut the
rear part by using the outer surface of the drum to secure with
rivets the same way Tracy did it.
The drum thickness is very low beside the facing rib .
I am sending you a photo it might help you on your project
Jean Prudhomme
Hey Jean thanks a bunch. I was wondering where that part came
from.
BTW I am thinking of setting up a high speed DC electric motor in
the lab to test these ideas.
Paul Lamar
--
The Rotary Engine NewsLetter. Powered by Linux.
ACRE NL web site.
http://www.rotaryeng.net
Youtube key word PaulLamar2
Copyright 1998-2010 All world wide rights reserved.